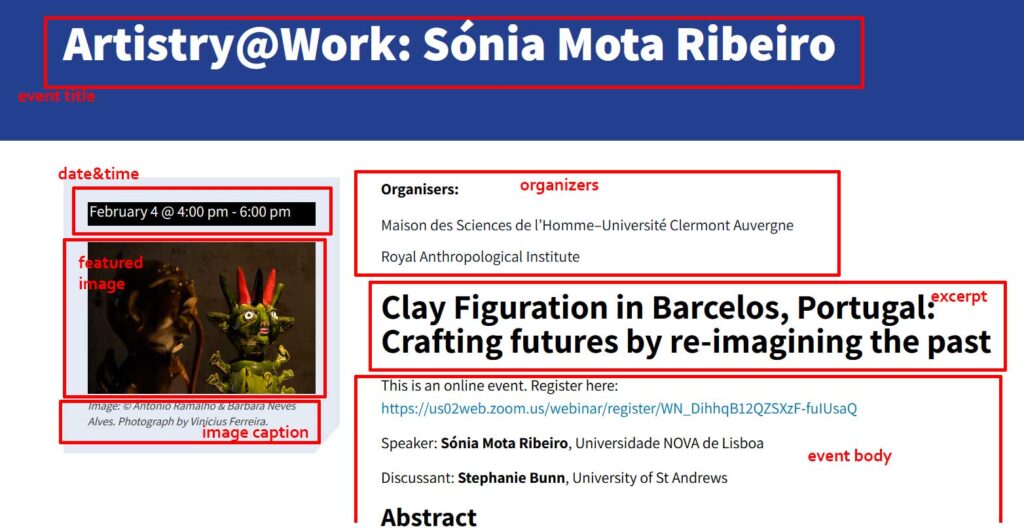
Data which are entered into fields rather than the text: Title, date&time, category, organisers, excerpt, featured image, image caption. This will help both formatting and structure.
Please note that the donation, join and mailinglist sections are in the template and so do not need to be added to the individual event.
Table of Contents
Adding the event text
Go to dashboard > events > add new
Enter the event title in the title field
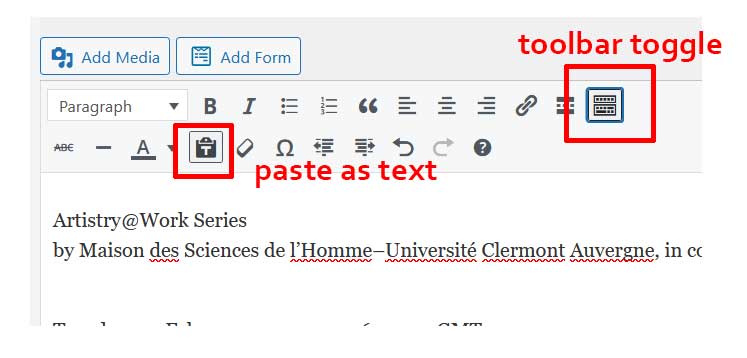
Click the toolbar toggle to get all the edit options
Click the “paste as text icon” and paste your event text into the edit window
Remove any generic text to do with donating, joining or mailinglist.
Leave as is for now
Set the featured image and caption
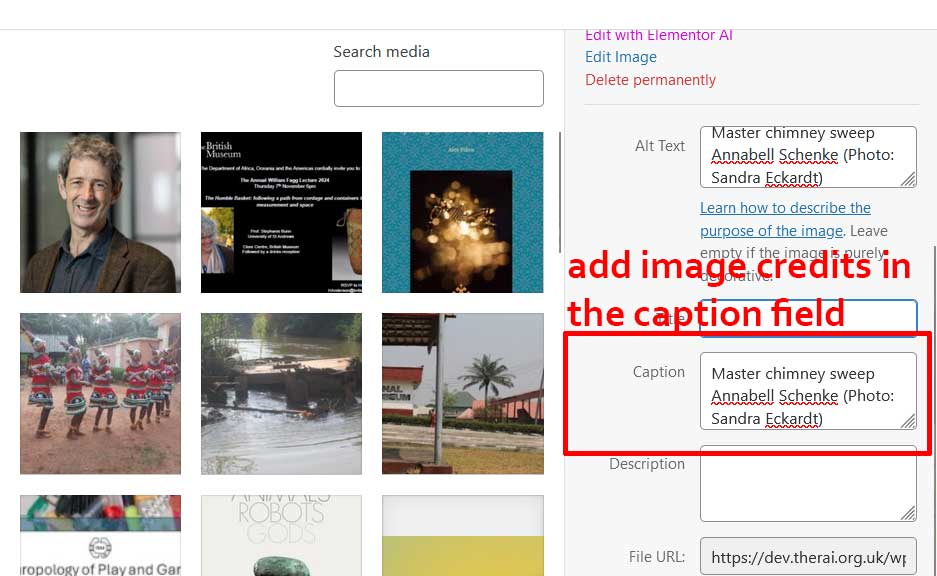
Click the “featured image” field in the right pane of the edit window
Upload the event image from your computer
Add any credits or descriptions to the caption field in the media manager
if there is no image, use either the RAI logo or “events-image-1” or the logo of another organiser, or an image of the venue
Extract the events data from the text
Cut the subtitle of the event out from the text and into the excerpt field (below edit window and events calendar fields)
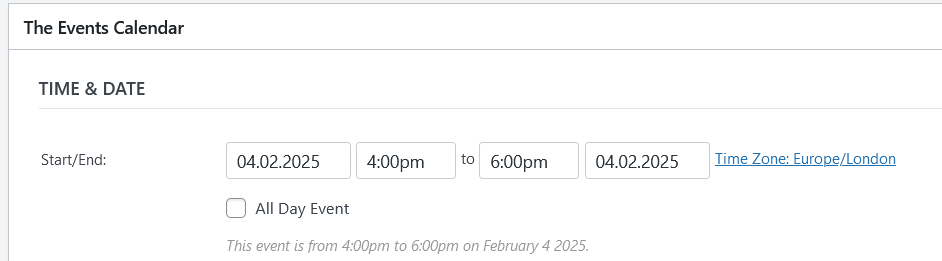
Cut the date&time and paste into the date field (below edit window)
Cut the organisers out and enter into the organiser field (below edit window). Multiple organisers can be entered, these will be saved for future use so please avoid duplicates.
NOTE: If you create a new organiser in this field, must click “enter” to complete, then click “update” to update the event. Now, the new organiser will display.
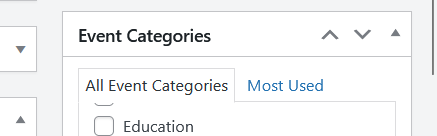
ONLINE EVENTS: These have a category “Online”.
Enter the event category in the category field (right), ie “online event”, “book launch”, “conference”. No event should be uncategorized. For online events us the venue Online
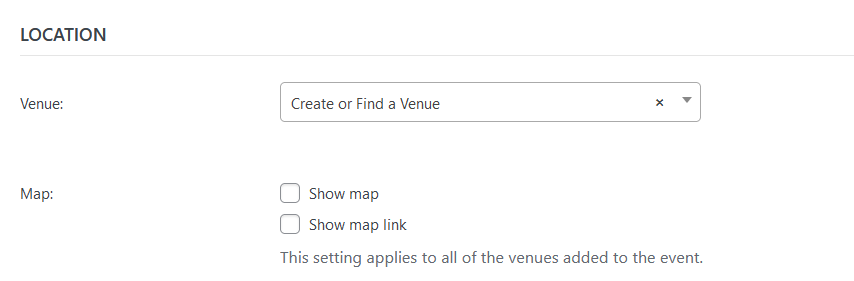
Find the event venue and location and set that (below edit window). Again, avoid dupes.
NOTE: These data should not be left in the event body text.
Add formatting to the event body
Making sure subtitle, date&time, organisers, category and location/venue does NOT remain in the event body text, now add simple formatting
Use bold and italics
Use single paragraph spacing only
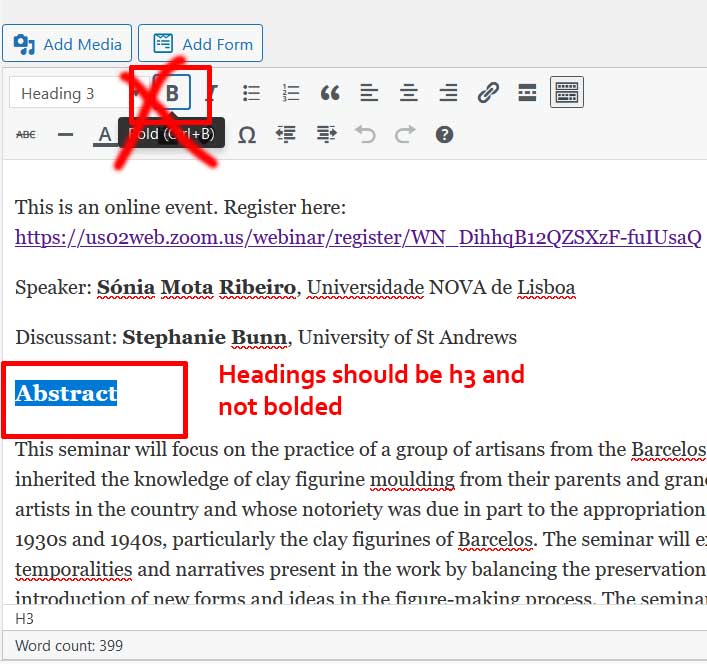
Use H3 for any headings.
make sure h3 headings have not applied bold formatting as that will make them too heavy.
Avoid using any other formatting, heading sizes, indents or double paragraph spaces.
Now save and view the event (the link is just below the event title
Current layout restrictions for series and categories
We are not using the event “Series” field due to current layout restrictions of series display (see left screenshot), however you can enter a series name in this field for future use.
We are not displaying events category links in the templates, again due to layout restrictions of the category displays, but all events should be assigned categories like they have on the old site
In the future, I envisage that layout options for series and categories will accommodate the site’s design
How the fields display in the front end
This is how the fields are set to display in the single events template.
(When we come to share events to social media, the share posts/tweets will display the title, excerpt and featured image from this view, unless we set it otherwise in SEO settings.)